

Frindsbury is a small town in Kent, opposite Rochester on the Medway, and from time to time regarded as part of that cathedral city, which Dickens used as the model for Cloisterham in The Mystery of Edwin Drood, his last, unfinished, novel. Inhabited since Palaeolithic times, its name is Anglo-Saxon, and it has a long and interesting history, but my focus today is on the activity in 1782 in the ship-building yard of Edward Greaves and Company, who had been commissioned by the Lords of the Admiralty to construct and fit out a 74-gun, third-rate ship of the line, to be called H.M.S. Bellerophon.
The ship’s name was allegedly taken from Lemprière’s Classical Dictionary, which the First Lord of the Admiralty, John Montagu, fourth earl of Sandwich, kept on his desk – along, one hopes, with the eponymous snack which he is supposed to have invented. The other items named after Sandwich are Hawai’i, the South Sandwich Islands in the southern Atlantic, and two Montague [sic] Islands (one off Australia, and one in the Gulf of Alaska): all in grateful recognition of Sandwich’s support for James Cook’s second and third voyages.
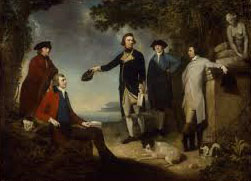
This 1771 group, painted by John Hamilton Mortimer, consists of Solander and Banks (left), Cook (centre), and Hawkesworth and Sandwich (right), and commemorates Cook’s first voyage. Credit: National Library of Australia.
Bellerophon was the Greek hero who rode on the winged horse Pegasus to kill the Chimaera, a fire-breathing monster composed of lion at front, goat in the middle and snake at the rear end: an appropriately warlike image for the ship, which was launched in October 1786, at a time of relative peace and stability, the American war of independence having been ended by the Treaty of Paris in 1783.
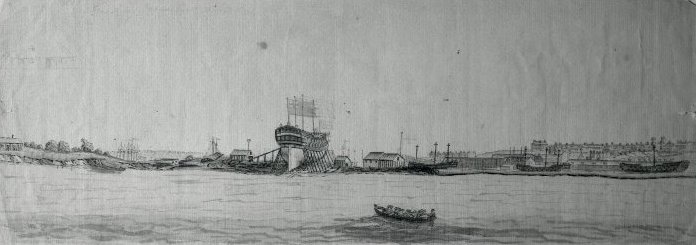
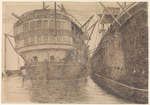
An anonymous sketch showing Bellerophon under construction at Frindsbury. Credit: the British Museum.
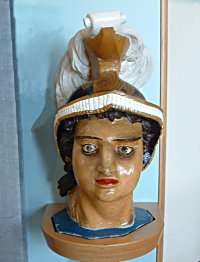
Part of the Bellerophon‘s figurehead. Credit: Royal Naval Museum, Portsmouth.
Her time at Chatham as part of the reserve fleet came to an end in 1790, and she was commissioned as part of the precautions during the so-called Spanish Armaments Crisis: neither this, nor the following Russian Armaments Crisis, actually led to war, so she was returned to Chatham for two years.
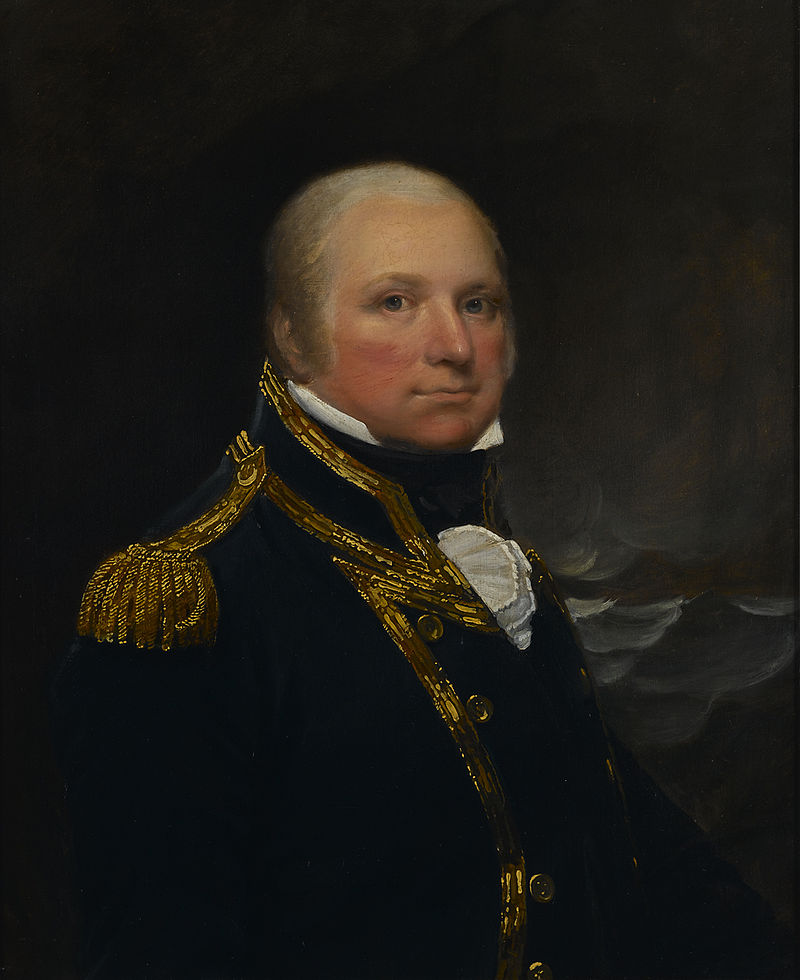
Bellerophon’s years of glory began in ignominy: as part of the Channel Fleet after the outbreak of the French Revolutionary War in 1793, she collided in a gale with H.M.S. Majestic, and had to put into Plymouth for repair. However, in the extensive battle known as the Glorious First of June (1794), she was the first ship to join conflict with the French fleet, her Captain Pasley being in charge of a scouting squadron which made contact on 28 May.
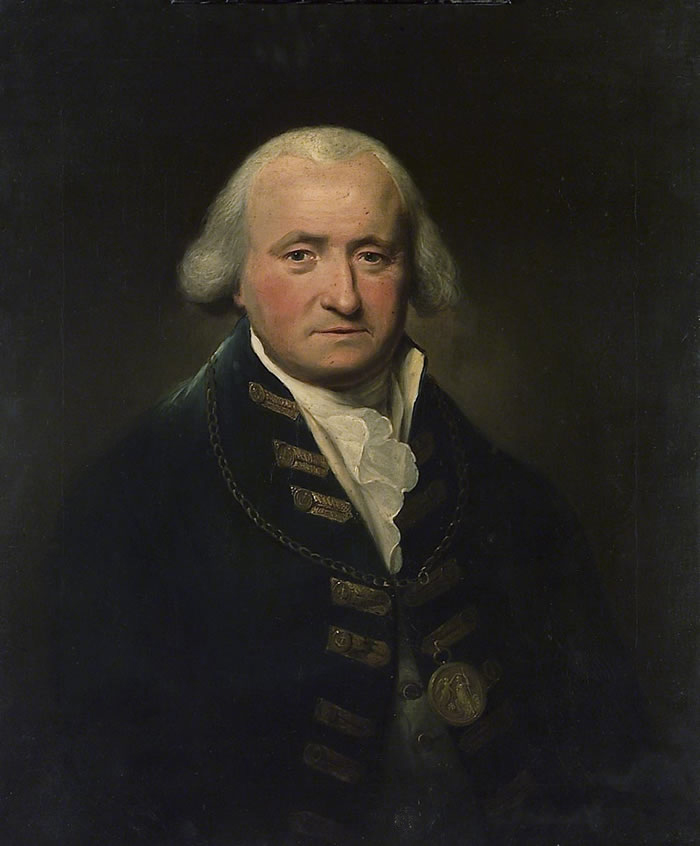
L.F. Abbott’s 1795 portrait of Sir Thomas Pasley, wearing the gold medal he earned for his part in the battle. Credit: National Maritime Museum, London.
In the main conflict, the damaged Bellerophon was at the end of the line, but this did not prevent a cannon-ball smashing Pasley’s leg as he stood on the quarter-deck: Midshipman Matthew Flinders reported that ‘our brave admiral lost his leg by an 18-pounder shot which came in through the barricadoes of the quarter-deck – it was in the heat of the action’. Pasley, in true British style, is said to have declared ‘never mind my leg: take care of my flag’. The ship lost all three topmasts, and her sails were shredded: she was towed away from the battle, though with relatively light casualties: only four seamen were killed.
Bellerophon was repaired in Portsmouth, and saw relatively little action until, assigned to the Mediterranean Fleet, she took part in the battle of the Nile, on 1 August 1796. Nelson, in command of the fleet, attacked the French after dark in Aboukir Bay, and Bellerophon came up against the mighty French Orient, with 120 guns.
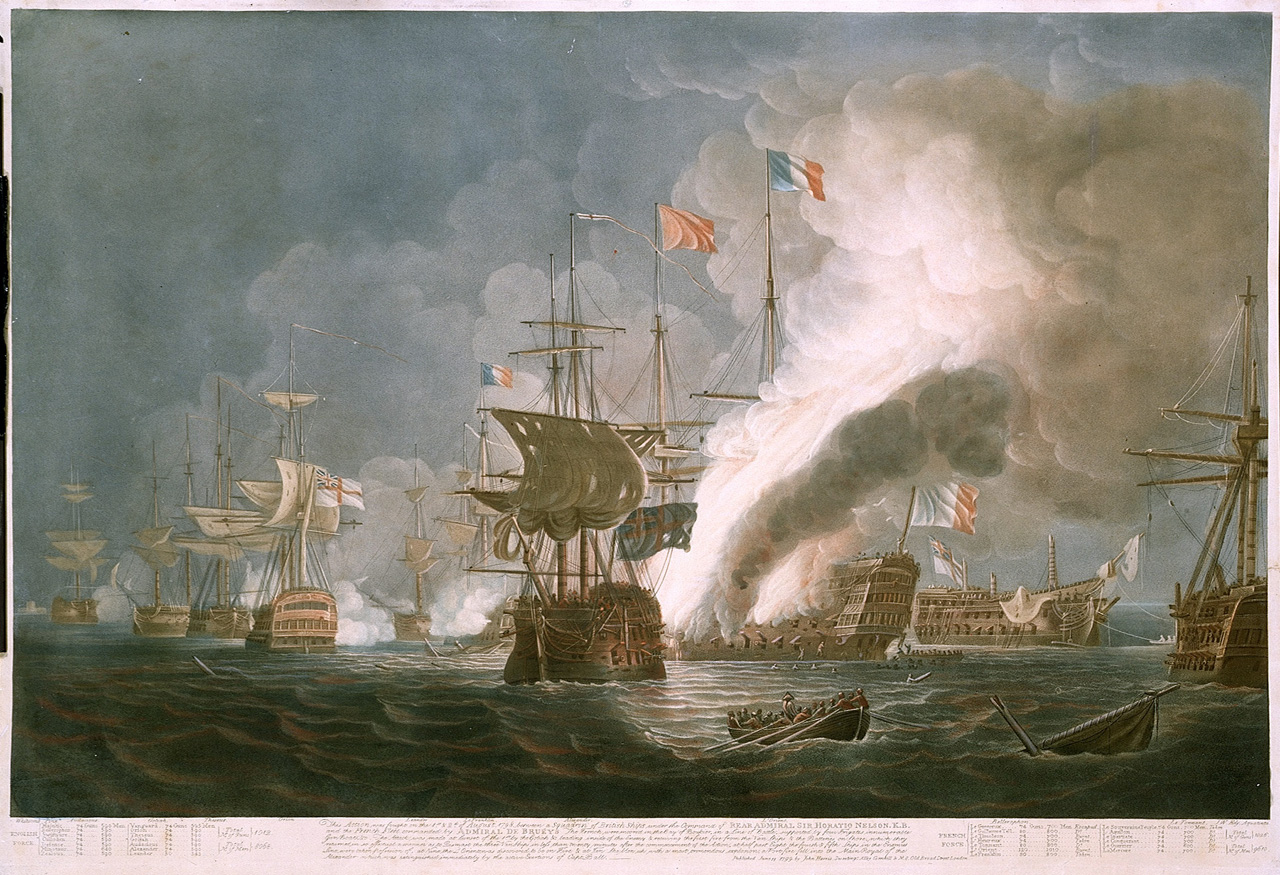
The battle of the Nile: the Orient on fire, with the dismasted Bellerophon behind her, by Thomas Whitcombe. Credit: National Maritime Museum.
A desperate struggle ensued, in which at one point a 13-year-old midshipman was the senior office unwounded and on deck, and the ship was completely dismasted. She almost met complete disaster, as H.M.S. Swiftsure, approaching the fray, thought she might be French, but thankfully held her fire, and in turn took on the Orient, which caught fire and blew up, scattering debris on the surrounding British ships.
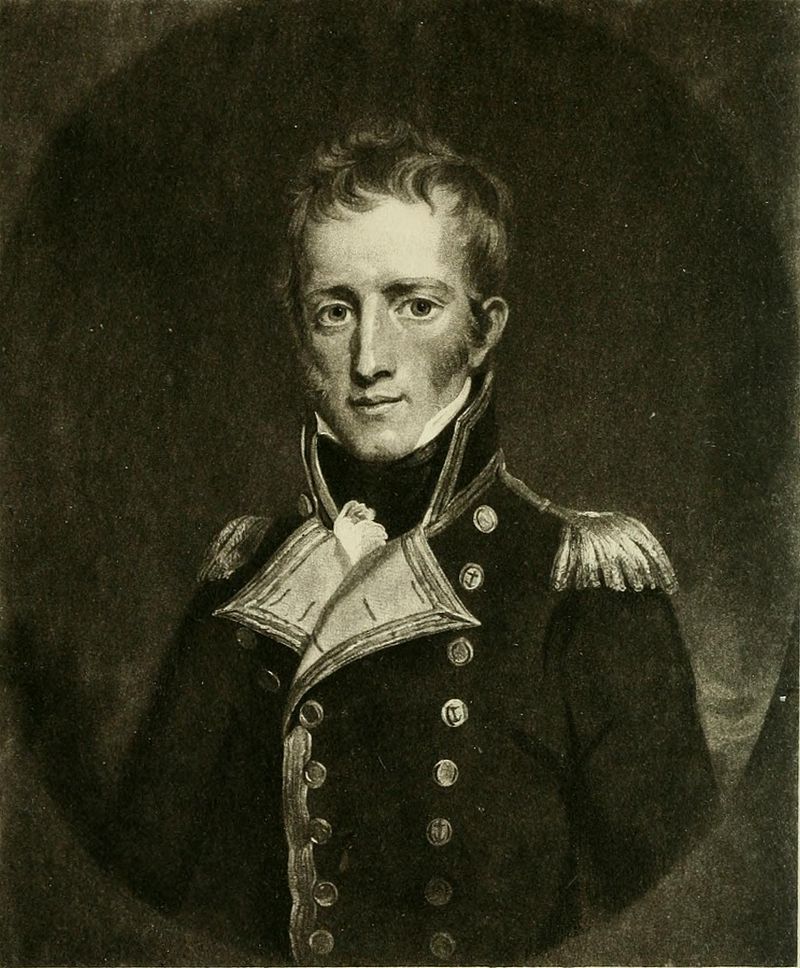
After a major refit, and time on the West Indies station (where about a hundred of the crew succumbed to malaria), Bellerophon was despatched back to the Channel Fleet, and, under the command of Captain John Cooke, took part in the battle of Trafalgar. It was a midshipman, John Franklin, the nephew of Matthew Flinders, who noted down Nelson’s famous flag signal on the morning of 21 October 1805.

Depiction of Bellerophon, surrounded by French ships, at the moment of Cooke’s death, by Thomas Whitcombe. Credit: National Maritime Museum.
Captain John Cooke, painted between 1797 and 1803 by L.F. Abbott.
Cooke, like Nelson on the Victory, was conspicuous by the decorations on his uniform, and was shot by two snipers: his last words were also in the heroic mould: ‘…let me lie quietly one minute. Tell Lieutenant Cumby never to strike’ [i.e. haul down the flag in surrender]. Masts tumbled, and the ship’s flag was shot away three times: a signaller grabbed a Union Jack, climbed up into the rigging, and hoisted it – while the French held their fire: ‘even the ranks of Tuscany could scare forbear to cheer’.
Bellerophon, though barely in a fit state, was chosen to escort the Victory, with Nelson’s body, back to England. She had herself lost 27 men, including Cooke, with 123 wounded. After yet another refit, she rejoined the Channel Fleet and was then sent to the Baltic (Russia having in 1809 allied itself with France), and then back to the Nore and the Channel. She was patrolling off Rochefort when Napoleon arrived there on 2 July after the defeat of Waterloo: surrendering to the British, rather than to the new French government, the Austrians or the Prussians, seemed his best bet.
His first communication to Captain Frederick Lewis Maitland was a request (unsurprisingly refused) to take him to the United States. Maitland counter-offered to take him to Britain, and early on the morning of 15 July, Napoleon and a small retinue came aboard.
Captain Maitland, from the frontispiece of his 1826 account of Napoleon’s surrender.
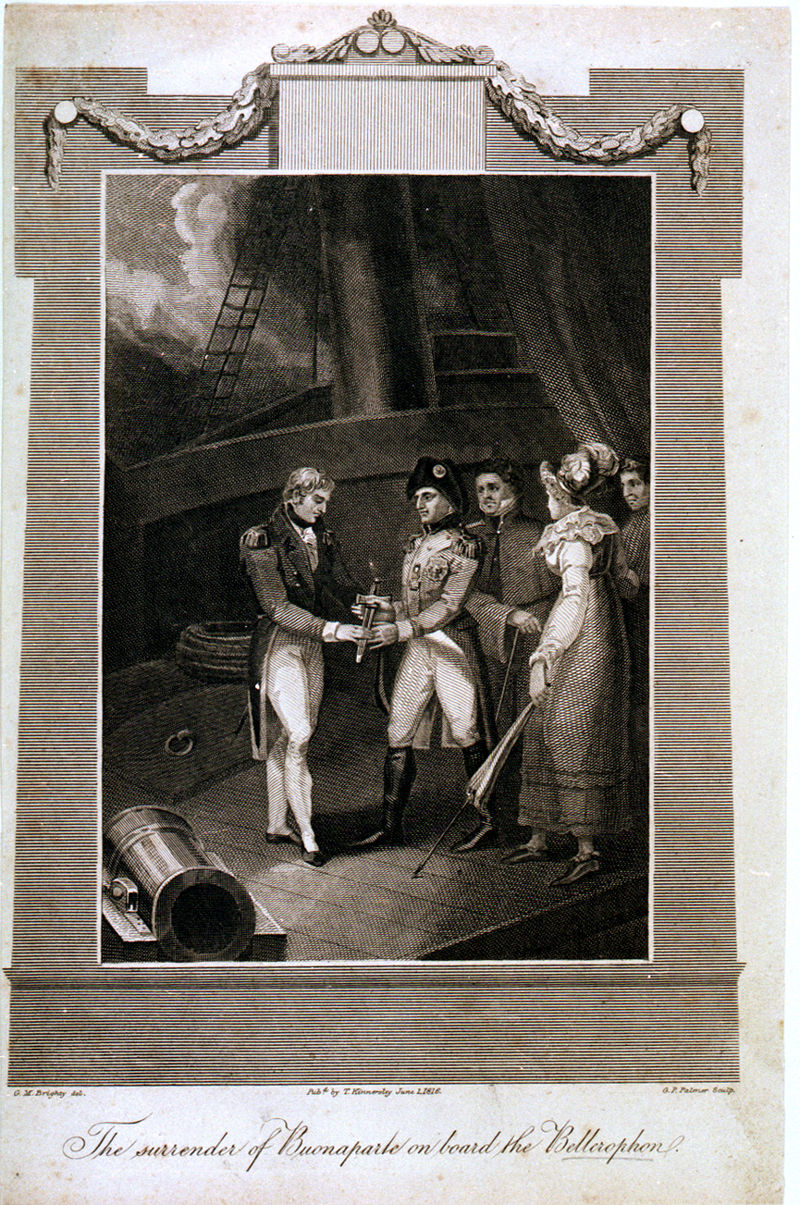
The surrender of Napoleon aboard the Bellerophon, an 1816 print by G.M. Brighty. Credit: the National Maritime Museum.
He was treated with great formality and courtesy, but he was not allowed to land in England. He stayed on the Bellerophon in Plymouth harbour, besieged by boatloads of curious sightseers, until 7 August, when he was transferred into H.M.S. Northumberland for the voyage to St Helena (the ageing Bellerophon being considered unfit for such a long journey).
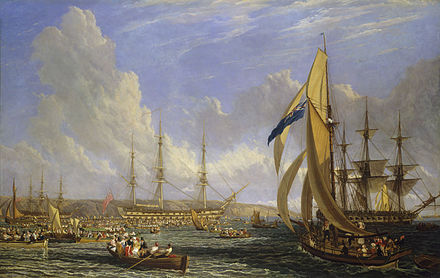
The scene in Plymouth Sound in August 1815, as sightseers surrounded the Bellerophon, by John James Chalon. Credit: the National Maritime Museum.
Among the sightseers at Plymouth was Charles Eastlake, who was rowed out to the ship to make the sketch for this portrait. Credit: the National Maritime Museum.
The ship had a sad decline: no longer fit for active service (and in peace time), she was fitted out as a prison ship, and even lost her name: the Admiralty wanted it for a newer warship, and in 1824 she was renamed Captivity. Ten years later (with the increase of transportation to Australia) she was declared redundant even for this purpose, and in 1836 was sold and broken up for her timbers: the National Maritime Museum has some relics.
H.M.S. Bellerophon as a hulk at Portsmouth Harbour. Credit: National Maritime Museum.
Next to the Victory, Bellerophon was the most famous warship of her day: though not necessarily under that name. The seamen who served in her, not having Lemprière’s Dictionary to hand, called her ‘Billy Ruffian’, and this is how she was know in many sea-shanties and popular songs of the day, including ‘Boney Was a Warrior’, which was still being taught to primary school classes in the middle of the twentieth century: it begins ‘Boney was a warrior, Way-aye-yah!’, and deals with his exploits against the Prooshians and the Rooshians, until Waterloo, after which
Boney went a-cruising
Way-aye-yah!
Aboard the Billy Ruffian
John Franswor!
Caroline

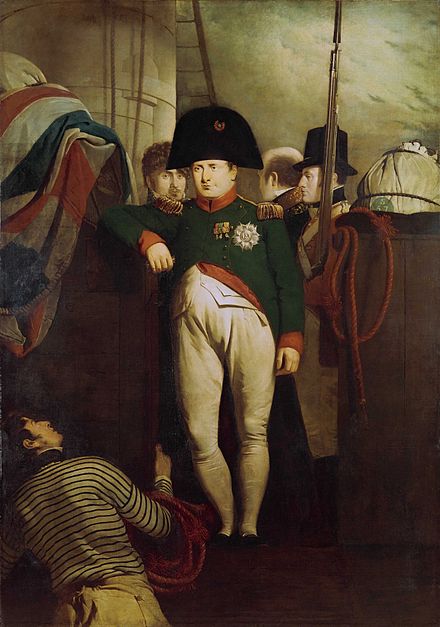
The most famous image of ‘Napoleon on Board the Bellerophon’ was exhibited in 1880 by Sir William Quiller Orchardson. Credit: Tate Britain.

Pingback: St Helena | Professor Hedgehog's Journal
Pingback: Object of the Month: August | Professor Hedgehog's Journal
Pingback: Chapmen | Professor Hedgehog's Journal